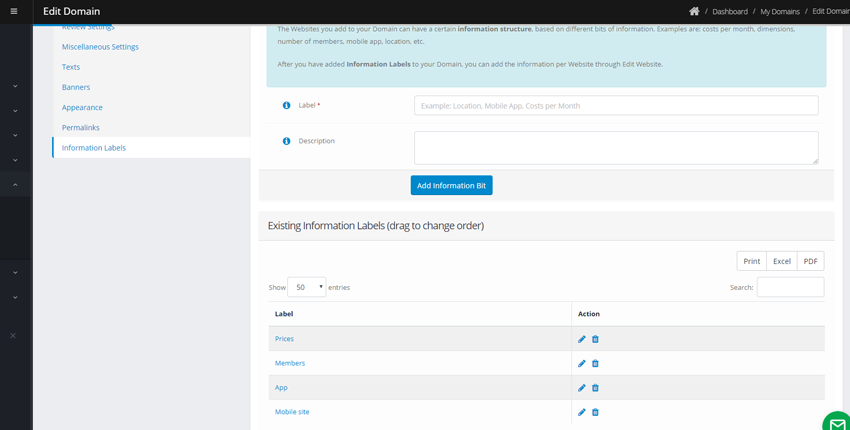
Creating information labels
Information labels, are labels you can create that will be at the bottom of your editorial review. It will look something like this:
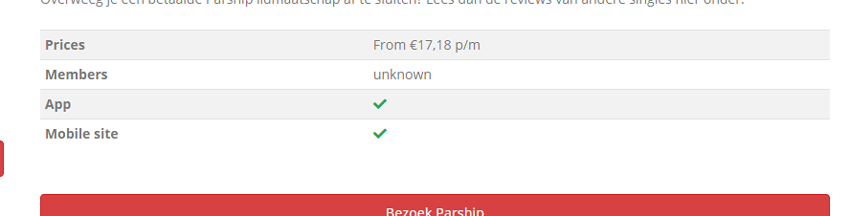
In this case there are, the labels "Prices", "Members", "App" and "Mobile site" are created. You can create these different labels by going to Edit Review Site/ Information labels. Enter the name in the "Label" text field. A description is optinal. When you scroll down a bit you can see the existing labels, edit them or change the order.
When you've created your labels, they will show when you select an Offer in "Edit Offers" under the Tab "Information labels". The checkmark icon that you see in the first picture will show when you add a simple yes (or no for a dash icon).
Creating comparison tables
To compare different offers on your domain you can create comparison tables. They will look like this:
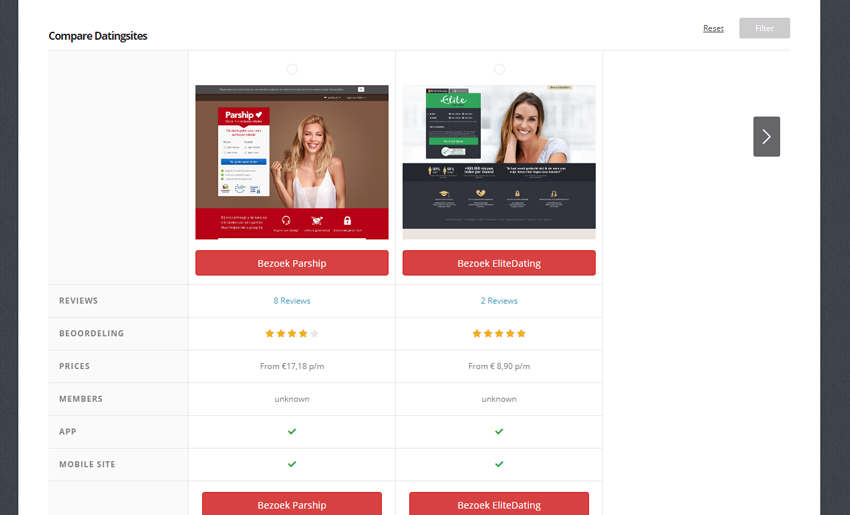
If you did not create any information labels, it will only show the amount of (consumer) reviews and the rating. In this case we've used the information labels Prices, Members, App and Mobile site that we created in the first part of this article.
To create a comparison table, go to Content / Comparison table. A new page will be created and you can name it (by filling out the Title) and write an introduction text. Now you can choose where a link to your new page will show by marking one of the check boxes (Main navigation in the top or a simple link in the footer). You can also choose to have your comparison table on your frontpage.
You can choose to add or remove specific offers from your comparison table.
To make fully use of your table we suggest that you create your information labels first and add the information of every offer you want in your table, before creating your comparison table.